|
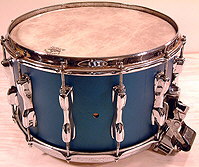
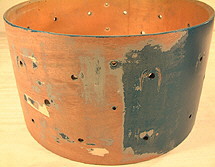
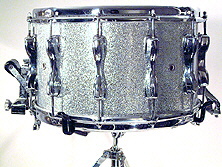
This is a step by step process for refinishing a snare drum with Precision Drum Recovering Materials. First decide on the finish you want for your drum. Take a look at the Precision Drum web site for the available options. The silver sparkle finish was picked because it was available when the drum was made and it is a popular finish that matches any drum set. This drum is a 8 X 14 Slingerland Magnum Snare with 4 vent holes, 12
lugs and a Slap Shot Strainer System. The drum when I bought it for
$58.00 was spray painted aqua and in fairly good condition over all.
Once I decided on the material and ordered it from Precision Drum, I
followed the handy direction sheet step by step. |

| Before beginning the recovering process, read the entire instruction booklet that was included with your recovering kit. If you do not understand any of the instruction steps, call or e-mail Precision Drum Company for assistance. It is important that you understand all of the instructions before you begin. |
Step 2 (Getting the supplies together)
Standard Tools |
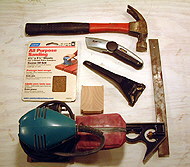
Extra Tools |
||
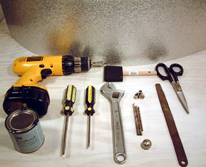 |
1. The Finish 2. Standard Drill 3. Screwdrivers 4. Wrench 5. Drill Bits 6. File 7. Scissors 8. 3m Adhesive 9. Grommet 10. Ball Bearing (for grommet) or ball peen hammer. |
1. Hammer 2. Palm Sander & Paper 3. Block of Wood 4. Scraper 5. Utility Knife 6. Square |
 |
Step 3
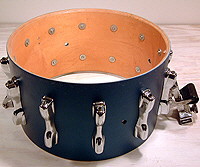
The Drum |
Remove the Hardware |
||
 |
 |
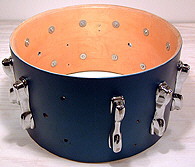 |
Remove all of the hardware from
the shell and store it in Zip Loc bags. This would be a good time to
clean the hardware and pack the lug casing spring with felt. |
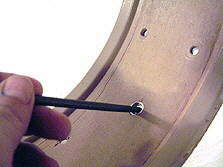
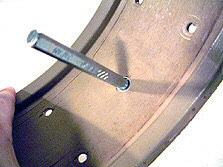
Step 3A (Removing the badge and grommet)
Dremmel Tool |
Small File |
Pliers |
Punch |
| Use a Dremmel Tool with a cut off wheel. Carefully cut the grommet from the inside and then you can easily bend the grommet inward. Cut it in 4 spots. | By taking a small file you can carefully
file the grommet down and it will then be easily removed with a pliers. |
Use a sharp screwdriver and carefully
peel the grommet around the edge and then us a pliers to bend it in
and pull it out from the outside. |
Insert a tapered punch from the inside,
and lightly tap with a small hammer. Brace the outside of the shell
around the badge |
 |
 |
 |
 |
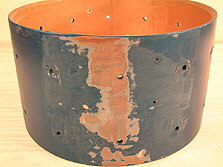
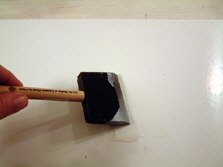
Step 4 (Removing old finish painted)
Bare Shell |
Remove the finish |
||
 |
 |
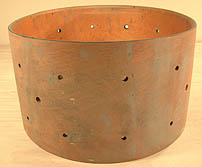 |
This drum was painted so you
could either use paint stripper like Zip Strip or sand the shell. make
sure it is smooth. Clean the shell so it is dust free when you are done. |
Step 4A (Removing old finish wrap)
| Use a scraper |
Remove the old wrap |
||
 |
 |
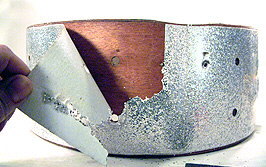 |
*Caution:
Be careful when using a heat gun, old drum finishes will catch on fire. |
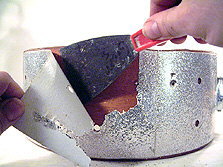
Use a scraper on the seam and
see if the finish lifts easily, continue unless you have problems. You
can also very carefully use a heat gun*
to remove the finish. Clean any glue residue with an adhesive remover
or sand the shell. |
Step 5 (Marking shell and wrap for step 7)
Test the wrap and mark the shell |
Use tape to hold the finish
in place. |
||
 |
 |
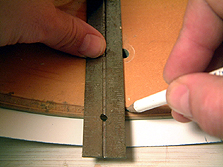
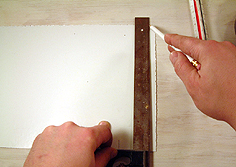
The important part here is
to have the finish that over laps on the outside, to end up on a lug
line. This way the majority of the seam is under a lug. Once the wrap
is lined up mark the shell and wrap so that it will line up later. |
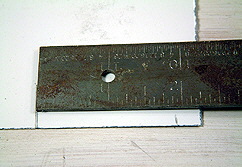
You also need
to check the under wrap at the seam point so it is less then 2 inches.
Put a line directly at the over wrap point and then measure to the end.
|
Step 5A (Trim excess overlap)
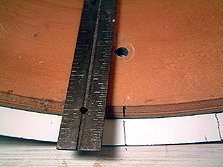
Leave if under 2" |
You will have to measure and
cut if it is over 2" |
||
 |
 |
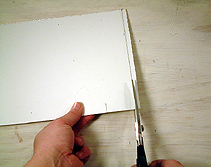 |
Use a square so
you get an even line. Cut with the scissors. |
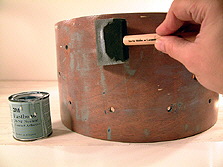
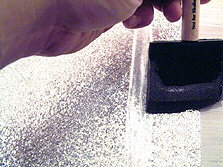
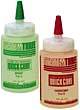
Step 6 (Applying the 3m adhesive)
Apply 3M Adhesive |
Apply glue to the entire outside
shell surface, entire wrap back surface, and 2" (or less) overlap
portion of finish side of wrap" |
*PEEL PROTECTIVE
LAYER BACK 2" or less from edge |
|
 |
 |
 |
 |
| *Make
sure when you apply the adhesive on the exterior part of the finish
that you peel back the clear protective plastic layer. Many finishes
come with this protective layer. The glue is easy to remove by rubbing
your finger on the excess. Better to go over then under at this point.
The adhesive must come in contact with adhesive and this is how it works.
Make sure also that the glue is applied along the edges of the finish
and the edge of the shell. Take your time and get good coverage. This
is very important. |
Step 7 (Applying the finish to the shell)
Use a wall as your guide |
|||
 |
1.
Place the finish against the wall 2. Lower shell while against the wall 3. Remember those pencil marks? 4. Line up those marks 5. Slowly apply the finish around the shell. Make sure the side with the glue on the sparkle side goes down first so the finish goes over it. |
No
turning back once they contact each other! |
|
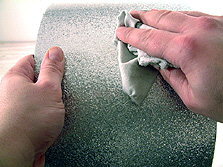
Step 8 (Pressing the finish down)
| Use a cloth
to press down and help the bond. You can also use a small roller if
you have one. |
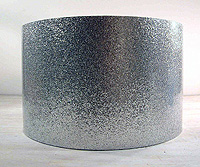
Finished shell! |
 |
 |
Step 9 and 10 (Cutting the extra wrap and filing the finish)
Cutting the extra wrap |
Detail Filing |
||
 |
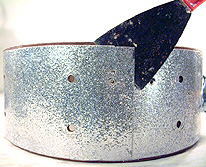
Use a very sharp knife
when you cut the overhang of finish. I found it helpful to cut the wrap
on a slight angle. This will help when it comes time to file the edge
to match the contour of the shell. Take your time! |
 |
Work your way around the
shell on a slight angle to finish off the edge. Take your time! |
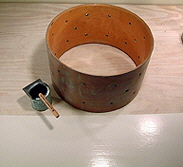
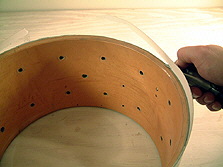
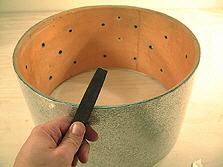
Step 11 (Drilling the holes)
Drilling the holes |
Finished drilled shell |
||
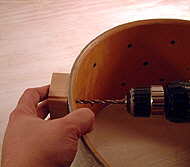 |
Use the block of wood
and while applying pressure drill the holes from the inside. Use a drill
bit that fits the hole as close as possible without drilling the hole
larger. |
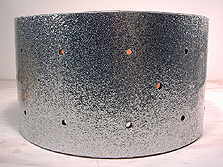 |
Take your time and let
the drill do the work. Do not force it and you will have a shell that
looks like this. Excellent! |
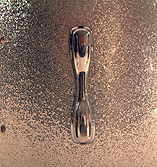
Step 12 (Putting the badge and grommet back on the shell)
When using any of these methods you
are securing the badge to the drum. None of them will give you a factory
bend. This is done with a large machine. It all depends what you are
going for and how it will turn out. Precision Drum recommends the steel
ball or ball peen hammer method. I have seen tools that will press the
grommet down and some people use a bolt with a washer and nut and tighten
the badge with this method. |
Glue |
Steel Ball |
Peen Hammer |
 |
. |
|
| Use a good epoxy to hold
the grommet in place. |
Place the drum on a wood block with
the outside of the grommet down. On the inside of the shell put the
steel ball on the grommet and hit it with a hammer. This will flare
the grommet towards the shell |
Place the drum on a wood block with
the outside of the grommet down. On the inside of the shell put the
peen hammer over the grommet and hit it with another hammer. This will
flare the grommet towards the shell. |
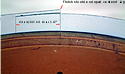
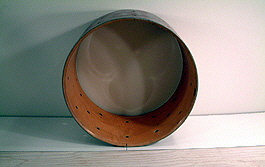
Lug Casing with Seam |
Finished Drum |
||
 |
The seam lines up perfectly
behind the lug. |
 |
Wow! |